Aadhar Card Online Application Official Website: घर बैठे आधार कार्ड अपडेट और डाउनलोड कैसे करें? जानिए UIDAI के नए फीचर्स!
Aadhar Card Online Application Official Website 2026: Dosto, आज के समय में आधार कार्ड सिर्फ एक पहचान पत्र (Identity Card) नहीं है, बल्कि यह हमारे जीवन का एक अनिवार्य हिस्सा बन चुका है। बैंक खाता खुलवाना हो, सिम कार्ड लेना हो या सरकारी योजनाओं का लाभ उठाना हो, आधार कार्ड हर जगह जरूरी है।
अक्सर लोग कंफ्यूज रहते हैं कि आधार कार्ड की असली वेबसाइट कौन सी है और ऑनलाइन काम कैसे होता है। आज के इस आर्टिकल में हम Aadhar Card Online Application Official Website और इसके इस्तेमाल के सही तरीके के बारे में विस्तार से जानेंगे।
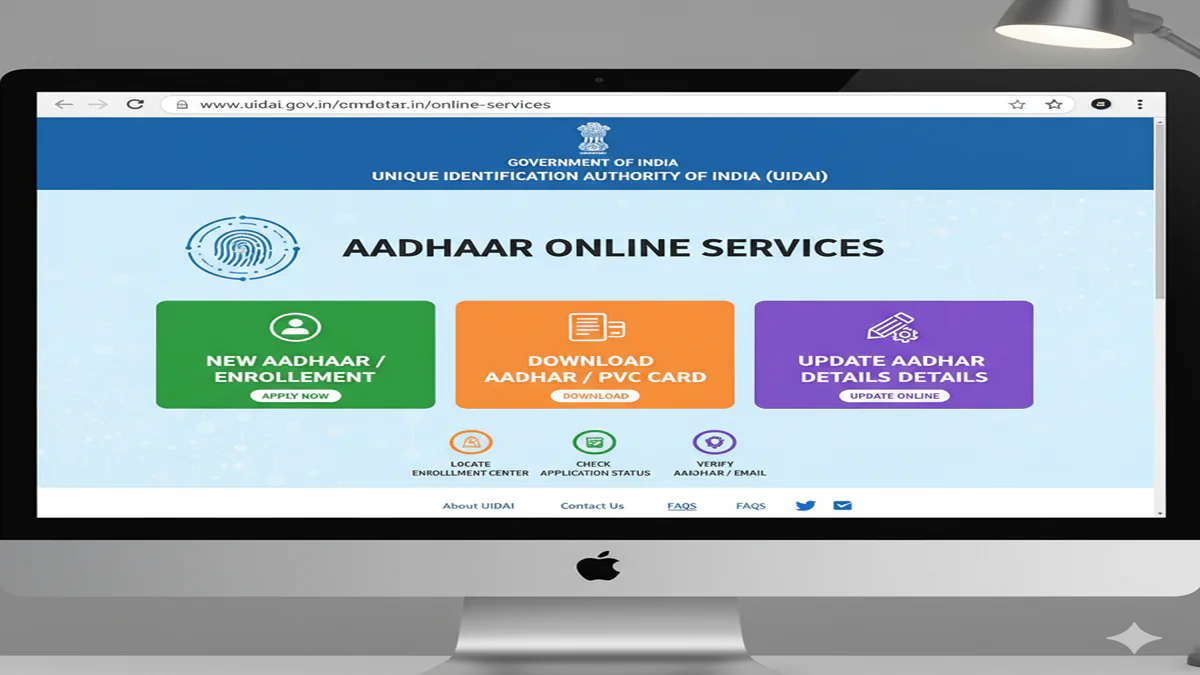
1. आधार कार्ड की Official Website कौन सी है?
Aadhar Card Online Application Official Website 2026: भारत में आधार कार्ड जारी करने वाली संस्था UIDAI (Unique Identification Authority of India) है। इसकी केवल दो ही आधिकारिक वेबसाइट्स हैं:
- Main Portal: [suspicious link removed]
- Self-Service Portal: myaadhaar.uidai.gov.in
सावधान: गूगल पर कई फेक वेबसाइट्स भी दिखती हैं जो पैसे ठग सकती हैं। हमेशा ऊपर दी गई लिंक्स का ही उपयोग करें।
2. MyAadhaar Portal पर मिलने वाली Services
Aadhar Card Online Application Official Website 2026: UIDAI के नए पोर्टल पर आप बिना आधार सेंटर गए कई काम खुद कर सकते हैं:
- Document Update: अपने आधार को फ्री में अपडेट रखें (समय-समय पर सरकार इसे फ्री करती है)।
- Download Aadhaar: अपने मोबाइल पर ई-आधार डाउनलोड करें।
- Address Change: अगर आपने घर बदला है, तो ऑनलाइन पता अपडेट करें।
- Bank Seeding Status: चेक करें कि आपका आधार बैंक खाते से लिंक है या नहीं।
- Order Aadhaar PVC Card: प्लास्टिक वाला आधार कार्ड ₹50 में घर मंगवाएं।
3. नए आधार कार्ड के लिए Online Apply कैसे करें? (Step-by-Step)
Aadhar Card Online Application Official Website 2026: अगर आप पहली बार आधार बनवा रहे हैं, तो प्रोसेस पूरी तरह ऑनलाइन नहीं है (बायोमेट्रिक्स के लिए सेंटर जाना पड़ता है), लेकिन आप Appointment ऑनलाइन बुक कर सकते हैं:
- Official Website पर जाएं:
myaadhaar.uidai.gov.inओपन करें। - Book an Appointment: इस ऑप्शन पर क्लिक करें।
- Details भरें: अपना मोबाइल नंबर और शहर (City) चुनें।
- Time Slot चुनें: अपनी सुविधा के अनुसार तारीख और समय चुनें।
- Center विजिट करें: बुक किए गए समय पर आधार सेंटर जाएं। वहां आपकी फोटो, फिंगरप्रिंट और आईरिस (Iris) स्कैन की जाएगी।
4. आधार कार्ड में Address अपडेट कैसे करें?
Aadhar Card Online Application Official Website 2026: यह सबसे ज्यादा इस्तेमाल होने वाली सर्विस है:
- पोर्टल पर लॉगिन करें (OTP के जरिए)।
- ‘Update Address Online’ पर क्लिक करें।
- अपना नया पता भरें और Proof of Address (जैसे बिजली बिल, रेंट एग्रीमेंट) अपलोड करें।
- ₹50 की फीस जमा करें। 7 से 15 दिनों में आपका आधार अपडेट हो जाएगा।
5. आधार सेंटर जाने से पहले ये बातें जान लें!
- Mobile Number Link: आधार की ऑनलाइन सेवाओं का लाभ उठाने के लिए आपका मोबाइल नंबर आधार से लिंक होना चाहिए।
- Charges: नया आधार बनवाना ‘Free’ है। डेमोग्राफिक अपडेट (नाम/पता) के लिए ₹50 और बायोमेट्रिक अपडेट के लिए ₹100 की फीस लगती है।
Conclusion: डिजिटल इंडिया का लाभ उठाएं!
Aadhar Card Online Application Official Website का सही ज्ञान होने से आपका काफी समय और पैसा बच सकता है। दलालों के चक्कर में न पड़ें और खुद UIDAI के पोर्टल का उपयोग करें। अगर आपका आधार 10 साल पुराना है, तो उसे अभी लेटेस्ट डॉक्यूमेंट्स के साथ अपडेट जरूर कर लें।
Quick Links Table
| Service | Portal Link |
| Download Aadhaar | myaadhaar.uidai.gov.in/genricDownloadAadhaar |
| PVC Card Order | myaadhaar.uidai.gov.in/genricPVC |
| Check Status | myaadhaar.uidai.gov.in/check-adhaar-status |
| Aadhaar Appointment | appointments.uidai.gov.in |
6. Top 5 FAQs (आधार कार्ड अक्सर पूछे जाने वाले सवाल)
Q1. क्या मैं फोटो ऑनलाइन बदल सकता हूँ?
Ans: नहीं, फोटो और फिंगरप्रिंट अपडेट करने के लिए आपको आधार सेंटर जाना ही होगा।
Q2. ई-आधार का पासवर्ड क्या होता है?
Ans: आपके नाम के पहले 4 अक्षर (CAPITAL) और आपके जन्म का वर्ष (YYYY)। उदा: AMIT1995.
Q3. आधार अपडेट होने में कितना समय लगता है?
Ans: आमतौर पर 5 से 15 कार्य दिवस (Working Days)।
Q4. क्या बिना ओरिजिनल डॉक्यूमेंट के आधार अपडेट हो सकता है?
Ans: नहीं, आपको वैलिड सपोर्टिंग डॉक्यूमेंट्स की स्कैन कॉपी अपलोड करनी होगी।
Q5. PVC कार्ड कितने दिनों में घर आता है?
Ans: स्पीड पोस्ट के जरिए 10 से 15 दिनों के भीतर।
The Complete Guide to Applying for Your Aadhaar Card Online: A Step-by-Step Walkthrough
Aadhar Card Online Application Official Website In today’s digitally-driven India, the Aadhaar card has evolved from being just an identity proof to a crucial key that unlocks access to a myriad of services—from banking and taxation to social welfare schemes and mobile connections. Issued by the Unique Identification Authority of India (UIDAI), this 12-digit unique identity number is a cornerstone of the country’s digital infrastructure. While the enrollment process is primarily done in-person at Aadhaar Seva Kendras (ASKs) or Permanent Enrollment Centers, the official UIDAI website (uidai.gov.in and its resident portal myaadhaar.uidai.gov.in) is an indispensable hub for managing your Aadhaar lifecycle.
This comprehensive guide will walk you through everything you need to know about initiating the Aadhaar application online, booking appointments, updating details, and downloading your card, all from the comfort of your home.
Understanding the Online Role: It Starts with an Appointment
Aadhar Card Online Application Official Website 2026: A critical clarification first:You cannot complete the entire Aadhaar application process sitting at home.Biometric data (fingerprints and iris scan) and a photograph are mandatory components for de-duplication and uniqueness, and these require physical presence at an enrollment center. However, the official UIDAI website is designed to make this journey seamless, efficient, and paperless.
The online portal serves three primary functions for new applicants:
- Finding the Nearest Enrollment Center: Locate an authorized Aadhaar Seva Kendra.
- Booking an Appointment: Schedule your visit to avoid long queues and ensure service availability.
- Pre-filling the Application Form: Save time at the center by filling part of your demographic details online.
Step-by-Step Process for New Aadhaar Enrollment (Online Initiation)
Step 1: Visit the Official Website
Aadhar Card Online Application Official Website 2026: Navigate to the resident portal of UIDAI:https://myaadhaar.uidai.gov.in/. This is the official and secure platform for all Aadhaar services. Always ensure you are on the legitimate UIDAI website to avoid phishing scams.
Step 2: Locate an Enrollment Center
- On the homepage, click on ‘Get Aadhaar’ and then select ‘Locate an Enrollment Center’.
- You can search by your state, district, or pincode. For the most accurate and convenient list, use the ‘Search by Pincode’ option.
- The portal will display a list of centers near you, including their address, working hours, and the option to book an appointment. Centers labeled as ‘Aadhaar Seva Kendra’ (ASK) are dedicated, high-capacity facilities that work exclusively on appointment mode.
Step 3: Book an Appointment (Highly Recommended)
- Select your preferred center and click on ‘Book an Appointment’.
- You will need to provide your mobile number (which will be linked to your Aadhaar) and an email ID for OTP verification and confirmation.
- Booking an appointment is free of cost and guarantees you service at the chosen time, significantly reducing your waiting period.
Step 4: Pre-fill the Enrollment Form Online (Optional but Efficient)
- After booking, you can choose to ‘Fill the form online’. This opens the Aadhaar Enrollment Form.
- Carefully fill in all required demographic details:
- Full Name
- Gender
- Date of Birth
- Address
- Mobile Number & Email ID (for communication)
- Review all information meticulously. Any errors entered here will carry forward to your Aadhaar record.
- Upon submission, you will receive an Appointment Acknowledgement slip with a temporary Enrollment ID (EID). Print this slip or save it on your phone.
Step 5: Visit the Center for Biometric Capture
- On the scheduled date and time, visit the enrollment center with your appointment slip (digital or physical) and a set of supporting documents.
- Mandatory Documents: You need one Proof of Identity (PoI) and one Proof of Address (PoA). The UIDAI website provides a comprehensive list of accepted documents (e.g., Passport, PAN Card, Voter ID, Driving License, Utility Bills, Bank Statement).
- At the center, your biometrics (ten fingerprints, both iris scans) and photograph will be captured. The executive will verify your pre-filled data or help you fill the form physically if you skipped Step 4.
- Aadhar Card Online Application Official Website 2026: Before leaving, ensure you collect theAadhaar Enrollment Slip/Receipt. It contains your 14-digit Enrollment Number (EID) and the date of enrollment. This is crucial for tracking your Aadhaar status.
What Happens After Enrollment? Tracking and Downloading
- Acknowledgement: You will receive an SMS on your registered mobile number confirming the submission.
- This can take up to 90 days, but typically it is much faster (often within 30 days).
- Aadhar Card Online Application Official Website 2026: Tracking Status Online:
- Go to ‘Check Aadhaar Status’ on the homepage.
- Enter your 14-digit Enrollment ID (EID) and the date/time of enrollment (as on the slip).
- The portal will display the current status: “Under Process,” “Generated,” or “Dispatched.”
- Aadhar Card Online Application Official Website 2026: Downloading e-Aadhaar:
- Once the status shows “Generated,” you can download your Aadhaar letter.
- Click on ‘Download Aadhaar’ on the homepage. You will need your EID or Aadhaar number.
- To access the PDF, you must enter a password. (E.g., For RAM KUMAR born in 1990, the password is RAMK1990).
- The downloaded e-Aadhaar (PDF) is a legally valid, password-protected document as per the Aadhaar Act.
The Power of the Portal: Beyond New Enrollment
Aadhar Card Online Application Official Website 2026: The official website is a powerful tool for managing your Aadhaar throughout its lifecycle:
- Update/Correct Details: You can request updates to your name, address, date of birth, gender, mobile number, or email. While address updates can be done entirely online (using a documents-based or address verifier method), changes in demographic details (name, DoB, gender) require a visit to an enrollment center. Initiate the request online to get an Update Reference Number (URN).
- Aadhar Card Online Application Official Website 2026: Order a Reprint:Lost your Aadhaar letter? You can order a reprint online for a nominal fee. It will be dispatched to your registered address via India Post.
- Verify Aadhaar: Check if an Aadhaar number is valid or verify the details of a resident (with their consent).
- Lock/Unlock Biometric: For enhanced privacy and security, you can temporarily lock your biometric data linked to Aadhaar. When locked, it cannot be used for authentication. Unlock it temporarily when needed.
- Aadhar Card Online Application Official Website 2026: Check Authentication History:View a log of all transactions where your Aadhaar was used for authentication in the last 6 months.
Frequently Asked Questions (FAQs)
1. Is the online appointment and Aadhaar download completely free of cost?
Aadhar Card Online Application Official Website 2026: Yes, booking an appointment for enrollment or update at an Aadhaar Seva Kendra is free. Downloading your e-Aadhaar from the official website is also free. However, certain services like ordering a reprinted PVC Aadhaar card or requesting an address update via the document-based method online attract a nominal fee as prescribed by UIDAI.
2. What documents are acceptable for Aadhaar enrollment? Do they need to be self-attested?
Aadhar Card Online Application Official Website 2026: UIDAI accepts a wide range of documents as Proof of Identity (PoI) and Proof of Address (PoA), such as Passport, PAN Card, Voter ID, Driving License, Ration Card, Bank/Post Office Statement, Utility Bills (not older than 3 months), etc. You must carry theoriginal documentsorcopies attested by a Gazetted Officerfor verification at the enrollment center. Simple self-attested copies are generally not sufficient for the enrollment executive’s verification.
3. I have lost my Enrollment Slip (EID). How can I check my Aadhaar status or download it?
Aadhar Card Online Application Official Website 2026: If you have lost your Enrollment Slip, you can retrieve your EID by:
Clicking on ‘Retrieve Lost or Forgotten EID/UID’ on the website.
Providing your full name and the registered mobile number.
You will receive your EID via SMS. Use this to check status or download your Aadhaar.
4. My mobile number is not registered with Aadhaar, or I have changed it. What should I do?
Aadhar Card Online Application Official Website 2026: A registered mobile number is vital for OTP-based authentication and services. If your number is not registered or you have a new number, you must visit a permanent enrollment center to update it. This service is free. You cannot update your mobile number online without access to the old number. Carry your Aadhaar card and the new SIM card’s proof (if available).
5. Is e-Aadhaar equally valid as the physical card?
Aadhar Card Online Application Official Website 2026: Absolutely. As per the Aadhaar Act and rulings by the Ministry of Electronics & IT, thee-Aadhaar (PDF downloaded from the UIDAI website) is a legally valid proof of identity and address. It carries a digital signature by UIDAI and is accepted by all government agencies, banks, and other institutions across India. The masked Aadhaar option, where the first 8 digits are hidden, is also valid for use.
Conclusion: Empowerment at Your Fingertips
Aadhar Card Online Application Official Website 2026: The UIDAI online portal has democratized access to Aadhaar services, making them transparent, resident-friendly, and efficient. By leveraging the website to book appointments, pre-fill forms, download e-Aadhaar, and make updates, you take control of your digital identity. Remember, vigilance is key—always use the official UIDAI websites (uidai.gov.inandmyaadhaar.uidai.gov.in), never share your OTP or password, and keep your registered mobile number active. Your Aadhaar is more than a card; it’s the key to your digital existence in India, and managing it online is the smart, secure way forward.