


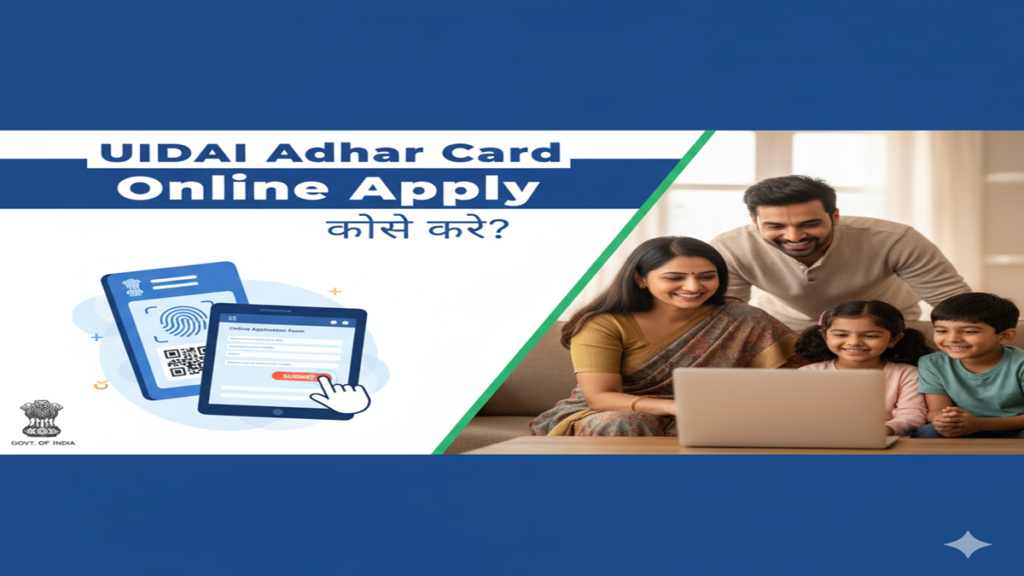
Uidai Aadhar Card Online Apply Kaise Kare: 2026 में नया आधार कार्ड बनाने की पूरी प्रक्रिया और जरूरी दस्तावेजों की लिस्ट!
Uidai Aadhar Card Online Apply Kaise Kare: Introduction: क्या आपने अभी तक अपना आधार कार्ड नहीं बनवाया है? या आपके परिवार में किसी छोटे बच्चे का आधार कार्ड बनवाना है? डिजिटल इंडिया के इस दौर में आधार कार्ड (Aadhar Card) केवल एक कार्ड नहीं, बल्कि आपकी पहचान और सरकारी लाभ पाने की चाबी है। अक्सर लोग सोचते हैं कि आधार कार्ड बनवाने के लिए घंटों लाइन में लगना पड़ेगा, लेकिन क्या आप जानते हैं कि “Uidai Aadhar Card Online Apply” की मदद से आप अपना काफी समय बचा सकते हैं?
आज के इस लेख में हम आपको UIDAI के नए पोर्टल के माध्यम से ऑनलाइन अपॉइंटमेंट बुक करने और नया आधार कार्ड बनवाने की पूरी प्रक्रिया विस्तार से समझाएंगे।
Uidai Aadhar Card Online Apply Kaise Kare: आधार कार्ड बनवाने के लिए आपको मुख्य रूप से तीन प्रकार के दस्तावेजों की आवश्यकता होती है:
- पहचान का प्रमाण (POI): पैन कार्ड, वोटर आईडी, पासपोर्ट या ड्राइविंग लाइसेंस।
- पते का प्रमाण (POA): राशन कार्ड, बिजली का बिल, पानी का बिल या बैंक पासबुक।
- जन्म तिथि का प्रमाण (DOB): जन्म प्रमाण पत्र (Birth Certificate) या 10वीं की मार्कशीट।
नोट: यदि आपके पास कोई भी दस्तावेज नहीं है, तो आप राजपत्रित अधिकारी (Gazetted Officer) द्वारा प्रमाणित फॉर्म का उपयोग भी कर सकते हैं।
2. UIDAI Aadhar Card Online Apply: स्टेप-बाय-स्टेप प्रोसेस
Uidai Aadhar Card Online Apply Kaise Kare: चूंकि आधार के लिए बायोमेट्रिक्स (उंगलियों के निशान और आंखों की पुतली का स्कैन) अनिवार्य है, इसलिए पूरी प्रक्रिया ऑनलाइन नहीं हो सकती, लेकिन आप अपना फॉर्म ऑनलाइन भरकर अपॉइंटमेंट
स्टेप 1: आधिकारिक वेबसाइट पर जाएं सबसे पहले UIDAI की आधिकारिक वेबसाइट uidai.gov.in या सीधे appointments.uidai.gov.in पर जाएं।
स्टेप 2: ‘Book an Appointment’ का चुनाव करें होमपेज पर ‘Get Aadhaar’ सेक्शन के अंदर ‘Book an Appointment’ पर क्लिक करें। यहाँ अपना शहर या लोकेशन चुनें और ‘Proceed to Book Appointment’ पर क्लिक करें।
स्टेप 3: मोबाइल नंबर और OTP वेरिफिकेशन ‘New Aadhaar’ विकल्प को चुनें। अपना मोबाइल नंबर और कैप्चा भरें। आपके फोन पर एक OTP आएगा, उसे दर्ज करके सबमिट करें।
स्टेप 4: आवेदन फॉर्म भरें (Appointment Details) अब एक फॉर्म खुलेगा जिसमें आपको अपनी जानकारी भरनी होगी:
- अपना पूरा नाम।
- जन्म तिथि और जेंडर।
- पते का पूरा विवरण।
- उन दस्तावेजों का चयन करें जिन्हें आप आधार सेंटर ले जाएंगे।
स्टेप 5: समय और तारीख का चयन (Time Slot) अब आपको अपने नजदीकी आधार सेवा केंद्र (Aadhar Seva Kendra) की लिस्ट दिखेगी। अपनी सुविधा के अनुसार तारीख और समय (Time Slot) चुनें।
स्टेप 6: रसीद डाउनलोड करें सबमिट करने के बाद आपको एक Appointment Slip मिलेगी। इसे डाउनलोड कर लें या इसका प्रिंट आउट ले लें।
3. आधार केंद्र पर क्या होगा? (Final Step)
Uidai Aadhar Card Online Apply Kaise Kare: तय समय पर आधार केंद्र पहुंचें। वहां आपको कोई लाइन नहीं लगानी पड़ेगी।
- वहां का ऑपरेटर आपके दस्तावेज चेक करेगा।
- आपकी बायोमेट्रिक्स (फोटो, 10 उंगलियों के निशान और आंखों का स्कैन) ली जाएगी।
- प्रक्रिया पूरी होने के बाद आपको एक Enrolment Slip दी जाएगी।
4. आधार कार्ड का स्टेटस कैसे चेक करें और डाउनलोड करें?
Uidai Aadhar Card Online Apply Kaise Kare: आधार कार्ड बनने में आमतौर पर 10 से 15 दिन का समय लगता है। आप अपनी एनरोलमेंट स्लिप पर दिए गए नंबर से myaadhaar.uidai.gov.in पर जाकर स्टेटस चेक कर सकते हैं। एक बार जब आधार जेनरेट हो जाए, तो आप इसे ऑनलाइन डाउनलोड भी कर सकते हैं।
4. अक्सर पूछे जाने वाले प्रश्न (FAQs)
Q1: क्या नया आधार कार्ड बनाने के लिए पैसे देने पड़ते हैं?
Ans: नहीं, नया आधार कार्ड बनवाना पूरी तरह मुफ्त (Free) है। हालांकि, भविष्य में नाम या पता सुधारने के लिए ₹50 से ₹100 की फीस देनी होती है।
Q2: बच्चों का आधार कार्ड कैसे बनता है?
Ans: 5 साल से कम उम्र के बच्चों का ‘बाल आधार’ (Blue Aadhar) बनता है। इसके लिए केवल बच्चे का जन्म प्रमाण पत्र और माता-पिता में से किसी एक का आधार कार्ड जरूरी है।
Q3: क्या मैं बिना अपॉइंटमेंट के आधार केंद्र जा सकता हूँ?
Ans: हाँ, लेकिन वहां भारी भीड़ हो सकती है। ऑनलाइन अपॉइंटमेंट लेने से आपका काम 10-15 मिनट में हो जाता है।
Conclusion: आज ही अपना आधार सुरक्षित करें!
Uidai Aadhar Card Online Apply Kaise Kare की प्रक्रिया अब पहले से बहुत सुरक्षित और तेज है। आधार न केवल आपकी पहचान है बल्कि यह आपके बैंक खाते और सिम कार्ड की सुरक्षा के लिए भी जरूरी है। ऊपर बताए गए स्टेप्स को फॉलो करें और अपना आधार कार्ड बिना किसी परेशानी के बनवाएं।
A Complete Guide to UIDAI Aadhaar Card Online Application (आधार कार्ड ऑनलाइन आवेदन कैसे करें)
Introduction Uidai Aadhar Card Online Apply Kaise Kare
Uidai Aadhar Card Online Apply Kaise Kare In the digital age, India’s Aadhaar card has transcended its role as a mere identity document to become a cornerstone of citizen empowerment and service delivery. Issued by the Unique Identification Authority of India (UIDAI), this 12-digit unique number is linked to an individual’s biometric and demographic data, ensuring a robust and verifiable identity.
While the process of enrolling for Aadhaar was traditionally done at physical Aadhaar Seva Kendras (ASKs), the UIDAI has significantly streamlined the journey with online functionalities. This comprehensive guide, spanning 2000-3000 words, will meticulously walk you through the online processes related to Aadhaar—from booking appointments for new enrollments to applying for a duplicate card and updating details—all from the comfort of your home.
Chapter 1: Understanding Aadhaar and Prerequisites for Online Processes
Uidai Aadhar Card Online Apply Kaise Kare: Before diving into the “how-to,” it’s crucial to understand what you can and cannot do online regarding Aadhaar.
1.1 What is Aadhaar?
Uidai Aadhar Card Online Apply Kaise Kare: Aadhaar is a proof of identity, not of citizenship. It serves as a universal identity infrastructure that can be used to verify and authenticate residents across public and private service networks. Its randomness (the number does not reveal any personal details) and uniqueness (backed by biometrics) make it secure and reliable.
1.2 What Can You Do Online?
- Uidai Aadhar Card Online Apply Kaise Kare: Book an Appointment for New Aadhaar Enrollment: This is the primary online step for first-time applicants. You cannot complete the entire enrollment online due to the mandatory biometric capture (fingerprints, iris scan).
- Order a Reprint of Aadhaar (Aadhaar PVC Card): If you have lost your Aadhaar letter or want a durable, pocket-sized PVC card, you can apply and pay for it online.
- Update Details in Aadhaar: You can initiate requests for updates/corrections in your demographic information (Name, Address, Date of Birth, Gender, Mobile Number, Email) online. However, for changes in biometrics (photograph, fingerprints, iris) or gender, a physical visit is required.
- Uidai Aadhar Card Online Apply Kaise Kare: Download e-Aadhaar: Instantly download a digitally signed PDF version of your Aadhaar, which is equally valid as the physical copy.
- Check Aadhaar Status: Track the status of your enrollment or update request.
- Verify Aadhaar Number/E-mail/Mobile Number: Use online tools to verify the authenticity of these details.
1.3 What You Cannot Do Online?
- Uidai Aadhar Card Online Apply Kaise Kare: Complete New Enrollment: Biometric data collection mandates a visit to an Aadhaar Seva Kendra.
- Change Biometric Information: Updates to fingerprints, iris, or photograph require in-person presence.
- Enroll Children Below 5 Years: For children under five, only biometrics of the parents are taken, and the child’s photo is captured. A mandatory biometric update is required when the child turns 5 and 15. The initial enrollment must be done at an ASK.
1.4 Prerequisites for Online Services
- Uidai Aadhar Card Online Apply Kaise Kare: Registered Mobile Number: This is the single most important requirement. All OTPs (One Time Passwords) for authentication and process tracking are sent to the mobile number linked with your Aadhaar.
- Scanned Copies of Supporting Documents: For updates or PVC card orders, have soft copies of relevant Proof of Identity (POI), Proof of Address (POA), and Proof of Date of Birth (DOB) documents (e.g., Passport, PAN Card, Voter ID, Driving License, Utility Bills) ready in PDF or JPEG format. The file size should be between 50 KB and 2 MB.
- A Stable Internet Connection.
Chapter 2: Step-by-Step Guide to Online Appointment for New Aadhaar Enrollment
Uidai Aadhar Card Online Apply Kaise Kare: Since the full enrollment cannot be done online, booking a slot at your nearest Aadhaar Seva Kendra is the key first step.
Step 1: Visit the Official UIDAI Website
Uidai Aadhar Card Online Apply Kaise Kare: Open your browser and go to the official UIDAI website: https://uidai.gov.in/ or directly to the appointment booking page: https://appointments.uidai.gov.in/.
Step 2: Locate the Appointment Service
Uidai Aadhar Card Online Apply Kaise Kare: On the UIDAI homepage, navigate to the “My Aadhaar” tab. From the dropdown menu, select “Book an Appointment.” You will be redirected to the appointment booking portal.
Step 3: Select Your City/Location
Uidai Aadhar Card Online Apply Kaise Kare: Enter your city, district, or state name. The system will display a list of all operational Aadhaar Seva Kendras (ASKs) in that region. Carefully select the center most convenient for you.
Step 4: Choose Service and Date/Time
- Select the service required: “New Aadhaar.”
- You will be presented with a calendar. Available dates will be highlighted in green. Select a suitable date.
- After selecting the date, choose a preferred time slot from the available options.
Step 5: Fill Applicant Details
Uidai Aadhar Card Online Apply Kaise Kare: Enter the required demographic details:
- Full Name (as per supporting document)
- Gender
- Date of Birth
- Your 10-digit mobile number (this will be linked to your Aadhaar for all future communications).
- Your email address (optional but recommended).
- Security Code (Captcha).
Step 6: Confirm and Generate Appointment Slip
Uidai Aadhar Card Online Apply Kaise Kare: Review all the entered details carefully. Once confirmed, submit the form. Your appointment will be booked, and an Appointment Acknowledgement Slip with a 14-digit Appointment ID will be generated. Download this slip and print it. You will also receive an SMS with the Appointment ID on your registered mobile number.
Step 7: Visit the Aadhaar Seva Kendra
Uidai Aadhar Card Online Apply Kaise Kare: On the scheduled date and time, visit the selected ASK. Carry the following with you:
- Printed copy of your Appointment Acknowledgement Slip.
- Original and a photocopy of your Proof of Identity and Proof of Address documents (Refer to the UIDAI document list).
- The mobile number you registered during booking.
Uidai Aadhar Card Online Apply Kaise Kare: At the center, your biometrics will be captured, and after data verification, you will receive an acknowledgement slip containing a 14-digit Enrollment Number (EID). Use this EID to track your Aadhaar status online.
Chapter 3: How to Apply for a Duplicate Aadhaar (PVC Card) Online
Uidai Aadhar Card Online Apply Kaise Kare: If you have lost your Aadhaar or want the new, durable PVC card, follow these steps to order a reprint online.
Step 1: Visit the UIDAI Website or myAadhaar Portal
Go to https://uidai.gov.in/ or the dedicated resident portal: https://myaadhaar.uidai.gov.in/.
Step 2: Login to myAadhaar Portal
Uidai Aadhar Card Online Apply Kaise Kare: Click on “Login” on the myAadhaar portal. Enter your Aadhaar Number or Virtual ID (VID). Enter the Security Code (Captcha) and click “Send OTP.” Enter the OTP received on your registered mobile number to log in.
Step 3: Navigate to ‘Order Aadhaar PVC Card’
Uidai Aadhar Card Online Apply Kaise Kare: Once logged in, look for the service “Order Aadhaar PVC Card” and click on it.
Step 4: Verify Details and Confirm
Uidai Aadhar Card Online Apply Kaise Kare: Your Aadhaar details (masked number, name) will be displayed for verification. Ensure they are correct. You will also see the fee, which is currently ₹50 (inclusive of GST and speed post charges).
Step 5: Make Payment
Uidai Aadhar Card Online Apply Kaise Kare: Click on “Make Payment.” You will be redirected to a secure payment gateway. You can pay using Credit/Debit Card, Net Banking, or UPI. Complete the payment process.
Step 6: Acknowledgement
Uidai Aadhar Card Online Apply Kaise Kare: Upon successful payment, an Acknowledgement Slip with a Service Request Number (SRN) will be generated. Download it for future reference. You will also receive an SMS confirmation on your registered mobile number.
Step 7: Delivery
Uidai Aadhar Card Online Apply Kaise Kare: The PVC card will be dispatched via India Post to your registered address within a few weeks. You can track the delivery status using the SRN on the myAadhaar portal or the India Post website.
Chapter 4: How to Update/Correct Your Aadhaar Details Online
Uidai Aadhar Card Online Apply Kaise Kare: Keeping your Aadhaar details updated is crucial. Here’s how to initiate an online update for demographic information.
Step 1: Login to myAadhaar Portal
Uidai Aadhar Card Online Apply Kaise Kare: As before, log in to the myAadhaar portal using your Aadhaar and OTP.
Step 2: Select ‘Update Demographics Data’ Service
On the dashboard, find and click on “Update Demographics Data” or “Update Your Aadhaar.”
Step 3: Choose Field to Update
The system will display your current details. Click on the field you wish to update (e.g., Name, Address, Date of Birth). Important: You can update only one field per request. If multiple fields need correction, you must submit separate requests.
Step 4: Enter New Information and Upload Documents
Enter the correct information as per your valid document. Then, upload a scanned copy of the supporting document that validates this change. For example, if changing your address, upload a valid Proof of Address document like a passport or utility bill.
Step 5: Preview and Submit
A preview of the updated information will be shown. Verify it meticulously. Submit the request.
Step 6: Review by UIDAI/UOP
Your request will be reviewed by the UIDAI or its appointed Update Operator (UOP). You can track the status using the Update Request Number (URN) provided.
Step 7: Visit Aadhaar Seva Kendra (If Required)
In many cases, especially for name or DOB changes, UIDAI may mandate an in-person verification at an ASK. If so, you will receive an notification. Use the “Locate an Update Centre” feature on the UIDAI website to find one and visit with your original documents.
Step 8: Download Updated e-Aadhaar
Once the update is approved, you will be notified via SMS. You can then download your updated e-Aadhaar from the “Download Aadhaar” section of the website.
Chapter 5: Important Tips, Security, and Troubleshooting
- Always Use Official Channels: Only use uidai.gov.in or myaadhaar.uidai.gov.in for any Aadhaar-related work. Beware of phishing websites.
- Linking Mobile Number is Key: Ensure your mobile number is always updated in Aadhaar. Without it, accessing most online services is impossible.
- e-Aadhaar is Valid: The password-protected e-Aadhaar (PDF secured with your PIN code) is a legally valid document anywhere in India.
- Lock/Unlock Biometrics: For enhanced security, use the “Lock/Unlock Biometric” feature on the UIDAI website. When locked, your biometrics cannot be used for authentication, protecting against misuse.
- Check Aadhaar Authentication History: Regularly review your authentication history on the UIDAI website to see where and when your Aadhaar was used for verification.
- Troubleshooting Common Issues:
- Mobile Number Not Linked: You must visit an ASK with your Aadhaar and proof of identity to get a mobile number registered or updated.
- Forgot Enrollment Number (EID): Use the “Retrieve Lost UID/EID” feature on the website using your registered mobile number.
- Payment Failed, but Amount Deducted: The amount is usually auto-refunded within 7-10 working days. If not, contact your bank with the transaction ID.
Conclusion
The UIDAI’s online ecosystem has democratized access to Aadhaar services, making them user-centric, efficient, and transparent. From booking your first appointment to ordering a sleek PVC card or updating your address after a move, the power to manage your identity lies in your hands—or rather, at your fingertips. By following this detailed guide and adhering to security best practices, you can navigate all online Aadhaar processes with confidence and ease, ensuring your foundational identity remains accurate, secure, and always accessible.
5 Frequently Asked Questions (FAQs) for UIDAI Aadhaar Card Online Apply
FAQ 1: क्या मैं पूरी तरह से ऑनलाइन नया आधार कार्ड बनवा सकता/सकती हूँ?
जवाब: नहीं, पूरी तरह से ऑनलाइन नया आधार कार्ड नहीं बन सकता। ऑनलाइन आप केवल अपॉइंटमेंट बुक कर सकते हैं। बायोमेट्रिक डेटा (उंगलियों के निशान, आंखों की रेटिना स्कैन और फोटोग्राफ) लेने के लिए आपको अपने निर्धारित समय पर आधार सेवा केंद्र (ASK) पर व्यक्तिगत रूप से जाना अनिवार्य है। वहाँ आपको अपने मूल दस्तावेजों की प्रस्तुति भी करनी होगी।
FAQ 2: अगर मेरा मोबाइल नंबर आधार से लिंक नहीं है, तो क्या मैं ऑनलाइन सेवाओं का उपयोग कर सकता हूँ?
जवाब: नहीं, आधार से लिंक मोबाइल नंबर ऑनलाइन सेवाओं की अनिवार्य आवश्यकता है। सभी OTP और नोटिफिकेशन इसी नंबर पर भेजे जाते हैं। यदि आपका नंबर लिंक नहीं है या बदल गया है, तो आपको अपने नजदीकी आधार सेवा केंद्र पर जाकर, आधार नंबर और पहचान के दस्तावेजों के साथ, मोबाइल नंबर अपडेट/जोड़ने की प्रक्रिया पूरी करनी होगी। उसके बाद ही आप ऑनलाइन पोर्टल का उपयोग कर पाएंगे।
FAQ 3: आधार पीवीसी कार्ड और डाउनलोड किए गए ई-आधार में क्या अंतर है? क्या दोनों मान्य हैं?
जवाब:
- आधार पीवीसी कार्ड: यह एक भौतिक, पॉकेट-साइज का प्लास्टिक कार्ड है जो टिकाऊ और पानी से सुरक्षित है। इसे ऑनलाइन आर्डर करने पर ₹50 शुल्क देना होता है और यह डाक से आपके पते पर भेजा जाता है।
- ई-आधार: यह UIDAI की वेबसाइट से मुफ्त में डाउनलोड किया जाने वाला पासवर्ड-सुरक्षित PDF डॉक्यूमेंट है। पासवर्ड आपके पिनकोड (ज़िप कोड) के आधार पर होता है।
हाँ, दोनों पूरी तरह से कानूनी रूप से मान्य हैं और किसी भी स्थान पर पहचान या पते के प्रमाण के रूप में स्वीकार किए जाते हैं।
FAQ 4: ऑनलाइन आधार में सुधार/अपडेट करते समय क्या मुझे फिर से बायोमेट्रिक देना होगा?
जवाब: यह इस बात पर निर्भर करता है कि आप क्या अपडेट कर रहे हैं।
- डेमोग्राफिक अपडेट (नाम, पता, जन्म तिथि, लिंग): इनमें से अधिकतर के लिए केवल संबंधित दस्तावेज अपलोड करने की आवश्यकता होती है। हालाँकि, नाम या जन्म तिथि जैसे महत्वपूर्ण बदलाव के लिए UIDAI कभी-कभी इन-पर्सन वेरिफिकेशन के लिए आधार केंद्र पर जाने को कह सकता है।
- बायोमेट्रिक अपडेट (फोटो, उंगलियों के निशान, आंखों का स्कैन): इनमें से किसी भी चीज़ को अपडेट करने के लिए आधार सेवा केंद्र पर व्यक्तिगत रूप से जाना अनिवार्य है।
FAQ 5: अगर मेरा आधार कार्ड खो गया है और मुझे नंबर भी याद नहीं है, तो मैं डुप्लीकेट कार्ड कैसे प्राप्त करूं?
जवाब: इसके लिए UIDAI की “खोया या भूला UID/EID पुनर्प्राप्त करें” (Retrieve Lost UID/EID) सेवा का उपयोग करें।
- UIDAI वेबसाइट पर जाएं और यह सेवा ढूंढें।
- आपसे आपका नाम, पंजीकृत मोबाइल नंबर और/या ईमेल पूछा जाएगा।
- एक OTP भेजा जाएगा। OTP सत्यापित करने पर, आपका आधार नंबर (मास्क्ड) या एनरोलमेंट नंबर (EID) आपके रजिस्टर्ड मोबाइल पर भेज दिया जाएगा।
- इस नंबर का उपयोग करके, आप ऊपर बताए गए तरीके से myAadhaar पोर्टल में लॉग इन करके पीवीसी कार्ड का ऑर्डर दे सकते हैं।