


Aadhar Card Appointment Online Kaise Le: Complete Guide (2026)
Introduction
Aadhar Card Appointment Online Kaise Le In today’s digital India, the Aadhar card has become an indispensable identity document for every citizen. From availing government subsidies to opening bank accounts and filing tax returns, this 12-digit unique identification number is required for numerous essential services. However, many people still face challenges when they need to update their Aadhar details or enroll for a new card. The process begins with booking an appointment at an Aadhar Seva Kendra, which can now be done conveniently online. This comprehensive guide will walk you through every step of securing an Aadhar card appointment online, along with addressing common questions and concerns.
Understanding Aadhar Enrollment and Update Services
Before diving into the appointment process, it’s essential to understand what services are available at Aadhar centers:
New Aadhar Enrollment: For individuals who have never enrolled for Aadhar before, typically including children above 5 years (since biometrics are captured at this age) and adults without Aadhar.
Aadhar Update Services: These include:
- Biometric updates (photograph, fingerprints, iris scan)
- Demographic updates (name, address, date of birth, gender, mobile number, email)
- Document updates
- Address update through proof or via secret code
Other Services: Downloading e-Aadhar, checking update status, and locking/unlocking biometrics.
Step-by-Step Guide: Booking Aadhar Appointment Online
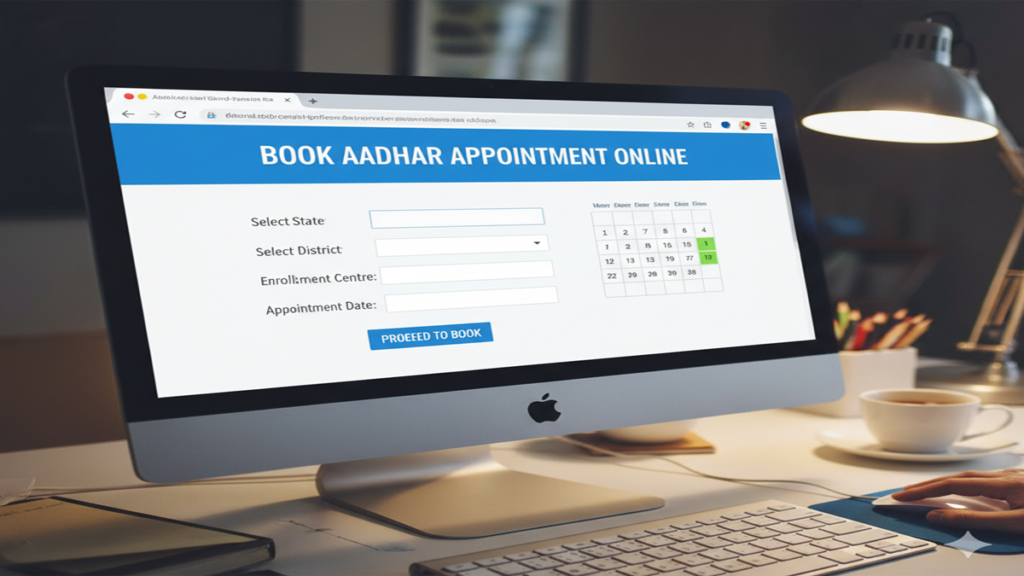
Method 1: Through the Official UIDAI Website
The most reliable method for booking an Aadhar appointment is through the official UIDAI portal:
Step 1: Visit the Official Website
Go to the UIDAI official website: https://uidai.gov.in/ or directly to the appointment booking portal: https://appointments.uidai.gov.in/
Step 2: Select Your Service Type
On the homepage, you’ll see options for:
- New Aadhar Enrollment
- Update Existing Aadhar (Demographic/Biometric)
- Address Update
Click on the service you require.
Step 3: Locate Nearest Enrollment Center
You’ll be redirected to a page where you need to:
- Enter your state, district, and sub-district
- Alternatively, you can search by pin code
- Click “Locate Centre” to find Aadhar Seva Kendras near you
Step 4: Check Slot Availability
Once you select a center, the system will display:
- Available dates (usually for the next 5-7 days)
- Time slots for each date
- Number of slots available per time period
Step 5: Book Your Slot
Select your preferred date and time slot, then proceed to fill in your details:
- Full name (as per existing documents)
- Gender
- Date of birth
- Mobile number (registered with Aadhar if updating)
- Email address
- Existing Aadhar number (if applicable)
Step 6: Confirmation and Download
After submitting your details, you’ll receive:
- An appointment confirmation with a reference number
- Option to download the appointment letter
- SMS and email confirmation (if you provided these details)
Method 2: Through the mAadhaar Mobile App
For those who prefer mobile convenience:
- Download the mAadhaar app from Google Play Store or Apple App Store
- Register using your Aadhar number (for updates) or mobile number (for new enrollment)
- Navigate to the “Appointment Booking” section
- Follow similar steps as the website to locate centers and book slots
- Receive digital confirmation on your app
Preparing for Your Aadhar Appointment
Documents Required
For New Enrollment:
- Proof of Identity (POI): Passport, PAN card, Ration card, etc.
- Proof of Address (POA): Bank statement, utility bill, passport, etc.
- Proof of Date of Birth (DOB): Birth certificate, SSLC certificate, passport, etc.
- Proof of Relationship (for children): Birth certificate mentioning parents’ names
For Updates:
- Existing Aadhar number
- Supporting documents for the changes you’re making
- If updating mobile number or email, the new number/email will need to be verified via OTP
Important Tips Before Your Appointment
- Carry Original Documents: Always bring original documents along with one set of photocopies.
- Arrive Early: Reach the Aadhar center at least 15 minutes before your scheduled time to complete any preliminary formalities.
- Dress Appropriately: Wear dark-colored clothes for better contrast in the photograph. Avoid white tops.
- Remove Accessories: Take off glasses, heavy jewelry, and head coverings (unless for religious purposes) for the photograph and biometric capture.
- Review Details Carefully: Before final submission at the center, carefully check all details being entered.
What to Expect During Your Appointment
At the Enrollment Center
- Verification: Your appointment details and documents will be verified.
- Data Entry: Your demographic information will be entered into the system.
- Biometric Capture: Your photograph, fingerprints (all ten fingers), and iris scan will be taken.
- Acknowledgement Slip: You’ll receive an acknowledgment slip containing:
- Enrollment ID (EID) or Update Request Number (URN)
- Date and time of enrollment
- Details of the center
- Tracking: You can track your Aadhar status using the EID/URN on the UIDAI website.
After Your Appointment: Tracking and Receiving Your Aadhar
Tracking Your Aadhar Status
- Visit the UIDAI website: https://uidai.gov.in/
- Go to “Check Aadhar Status” under “My Aadhaar” section
- Enter your Enrollment ID (EID) and the date and time of enrollment
- You can also check using your registered mobile number
Downloading e-Aadhar
Once your Aadhar is generated:
- Visit the UIDAI website’s “Download Aadhar” section
- Enter your Aadhar number or EID
- Receive OTP on registered mobile number
- Download the digitally signed e-Aadhar (Password: first 4 letters of your name in CAPS and your birth year in YYYY format)
Receiving Physical Aadhar Card
The physical Aadhar card typically arrives by post within 60-90 days of enrollment/update. If you don’t receive it, you can:
- Check the delivery status using the URN on India Post website
- Download and print e-Aadhar, which is equally valid
- Visit the enrollment center for assistance
Troubleshooting Common Issues
Appointment Slot Not Available
- Try Different Centers: Slots availability varies across centers
- Check Early Morning: New slots are often released early in the morning
- Be Flexible with Dates: Consider booking for weekdays instead of weekends
- Use the Reschedule Option: If you’ve booked but need to change, use the reschedule feature
Documents Not Accepted
- Ensure documents are recent (not expired)
- Name should match across documents
- Address proof should be in the correct format
- For name changes, follow proper sequence: Gazette notification → Bank/PAN update → Aadhar update
Biometric Issues
- If fingerprints are not capturing properly, ensure fingers are clean and not too dry/moist
- For permanent fingerprint issues, UIDAI provides exceptions with additional verification
Special Cases and Considerations
Aadhar for Children
- Below 5 years: Biometrics not captured; only photograph with parents. Update mandatory when child turns 5 and 15.
- 5-15 years: Biometrics captured. Update required at age 15.
- Above 15 years: Treated as adult enrollment.
Senior Citizens and Persons with Disabilities
- Many centers offer priority services
- Home enrollment available for bedridden individuals (contact regional UIDAI office)
- Wheelchair accessibility at most Aadhar Seva Kendras
NRIs and Foreign Nationals
- NRIs can enroll/update with valid Indian passport and visa
- Foreign nationals staying in India for more than 180 days are eligible
- OCI cardholders can enroll with OCI card and Indian visa
Benefits of Online Appointment System
- Time-Saving: No long queues or waiting times
- Convenience: Book from anywhere, anytime
- Transparency: Clear visibility of slot availability
- Reduced Crowding: Better management at centers
- Confirmation Assurance: Guaranteed service at appointed time
Security and Privacy Considerations
- UIDAI ensures strict data protection measures
- Biometric data is encrypted and securely stored
- Always use official UIDAI channels for appointments
- Never share your OTP or Aadhar number with unauthorized persons
- Use masked Aadhar where only last 4 digits are visible for general purposes
Future Developments
UIDAI is continuously improving the appointment system with:
- QR Code Based Check-ins: For faster processing at centers
- Real-time Slot Updates: More accurate availability information
- Integrated Document Verification: Pre-verification of documents online
- Multilingual Support: Expanding beyond English and Hindi
Conclusion
Booking an Aadhar appointment online has streamlined the entire process of enrollment and updates, making it significantly more efficient and user-friendly. By following the steps outlined in this guide, you can easily secure your appointment, prepare adequately for your visit, and complete your Aadhar-related work with minimal hassle. Remember that the Aadhar card is not just an identity document but a key to accessing numerous government and private services in India, so keeping it updated with correct information is crucial.
The digital infrastructure supporting Aadhar services continues to evolve, with UIDAI regularly introducing new features to enhance citizen convenience. Whether you’re applying for your first Aadhar card or updating existing information, the online appointment system ensures your experience is smooth, organized, and efficient.
Frequently Asked Questions (FAQs)
1. क्या मैं बिना अपॉइंटमेंट के आधार केंद्र जा सकता हूँ?
हाँ, आप बिना अपॉइंटमेंट के आधार केंद्र जा सकते हैं, लेकिन आपको वॉक-इन स्लॉट की उपलब्धता पर निर्भर रहना पड़ेगा और अधिक प्रतीक्षा समय का सामना करना पड़ सकता है। अपॉइंटमेंट बुक करने वाले लोगों को प्राथमिकता दी जाती है, इसलिए ऑनलाइन अपॉइंटमेंट लेना सबसे अच्छा विकल्प है।
2. आधार अपॉइंटमेंट के लिए कौन से दस्तावेज आवश्यक हैं?
नए आधार के लिए: पहचान प्रमाण, पता प्रमाण और जन्म तिथि प्रमाण। अपडेट के लिए: मौजूदा आधार और संशोधन के समर्थन में दस्तावेज। सभी दस्तावेज मूल और एक फोटोकॉपी ले जाएँ।
3. क्या मैं अपना आधार अपॉइंटमेंट रद्द या पुनर्निर्धारित कर सकता हूँ?
हाँ, आधार अपॉइंटमेंट को रद्द या पुनर्निर्धारित किया जा सकता है। आधिकारिक वेबसाइट पर “अपॉइंटमेंट प्रबंधन” अनुभाग पर जाएं, अपना रेफरेंस नंबर दर्ज करें और नई तारीख/समय चुनें। कृपया ध्यान दें कि यह सुविधा अपॉइंटमेंट से 24 घंटे पहले तक ही उपलब्ध है।
4. बच्चों के आधार के लिए क्या प्रक्रिया है?
5 वर्ष से कम आयु के बच्चों: माता-पिता के बायोमेट्रिक्स के साथ केवल फोटोग्राफ। 5-15 वर्ष आयु: बाल्यावस्था के बायोमेट्रिक्स कैप्चर किए जाते हैं। 15 वर्ष पूरे होने पर बायोमेट्रिक अपडेट अनिवार्य है। सभी मामलों में माता-पिता/अभिभावक की उपस्थिति और दस्तावेज आवश्यक हैं।
5. यदि मुझे अपॉइंटमेंट की पुष्टि SMS/ईमेल नहीं मिलती है तो क्या करूँ?
सबसे पहले अपने स्पैम/जंक फोल्डर की जाँच करें। यदि पुष्टि अभी भी नहीं मिली है, तो आधिकारिक वेबसाइट पर “अपॉइंटमेंट स्थिति जाँचें” अनुभाग का उपयोग करके अपनी नियुक्ति की स्थिति सत्यापित करें। अपना रेफरेंस नंबर सुरक्षित रखें और बुकिंग के बाद कॉन्फर्मेशन पेज का स्क्रीनशॉट लें। यदि समस्या बनी रहती है, तो यूआईडीएआई हेल्पलाइन 1947 पर संपर्क करें।