Apply Aadhar Card Online Step By Step: 2026 में नया आधार कार्ड बनवाने की पूरी जानकारी; अब नहीं काटने पड़ेंगे चक्कर!
Apply Aadhar Card Online Step By Step 2026: Dosto, आज के डिजिटल युग में आधार कार्ड (Aadhar Card) हमारे सबसे जरूरी दस्तावेजों में से एक है। चाहे स्कूल एडमिशन हो, बैंक अकाउंट खुलवाना हो या नया सिम कार्ड लेना हो—बिना आधार के कुछ भी मुमकिन नहीं है।
अक्सर लोग सोचते हैं कि नया आधार कार्ड बनवाने के लिए घंटों लाइन में खड़ा होना पड़ेगा। लेकिन क्या आप जानते हैं कि 2026 में आप इसकी आधी प्रोसेस ऑनलाइन पूरी कर सकते हैं? आज के इस ब्लॉग में हम देखेंगे Apply Aadhar Card Online Step By Step प्रोसेस, जिससे आपका कीमती समय बचेगा।
1. क्या आधार कार्ड पूरी तरह ऑनलाइन बन सकता है? (The Reality Check)
Apply Aadhar Card Online Step By Step 2026: सबसे पहले एक बात क्लियर कर लें: नया आधार कार्ड बनवाने के लिए आपको एक बार Aadhar Enrollment Center जाना ही पड़ता है। ऐसा इसलिए क्योंकि सरकार को आपके ‘Biometrics’ (फिंगरप्रिंट, आईरिस स्कैन और लाइव फोटो) चाहिए होते हैं, जो घर बैठे नहीं दिए जा सकते।
लेकिन, अच्छी बात यह है कि आप Appointment Online Book कर सकते हैं और फॉर्म भी ऑनलाइन भर सकते हैं, जिससे सेंटर पर आपको लाइन में नहीं लगना पड़ेगा।
2. जरूरी दस्तावेज (Documents Required)
Apply Aadhar Card Online Step By Step 2026: ऑनलाइन अप्लाई करने से पहले ये डॉक्यूमेंट्स अपने पास रखें:
- Proof of Identity (POI): पैन कार्ड, वोटर आईडी, या पासपोर्ट।
- Proof of Address (POA): राशन कार्ड, बिजली बिल, या पानी का बिल।
- Date of Birth (DOB) Proof: बर्थ सर्टिफिकेट या 10th की मार्कशीट।
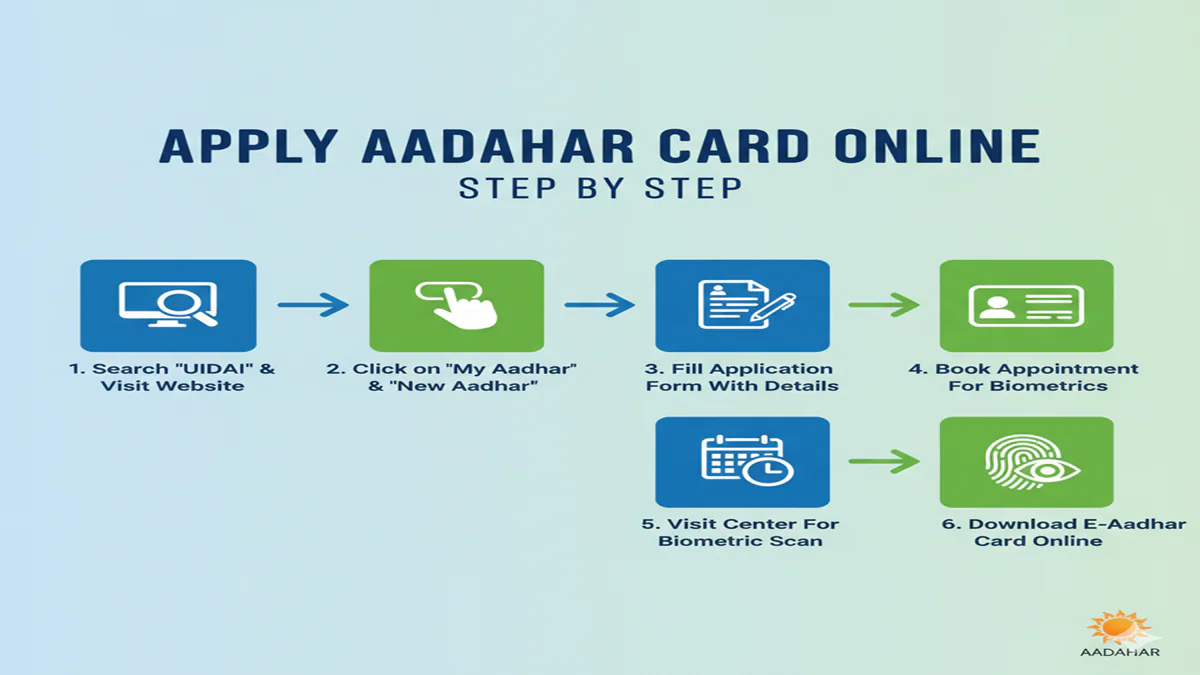
3. Step-by-Step: ऑनलाइन अपॉइंटमेंट और फॉर्म कैसे भरें?
Step 1: UIDAI की Official Website पर जाएं सबसे पहले myaadhaar.uidai.gov.in पर जाएं। यहाँ आपको ‘Book an Appointment’ का ऑप्शन दिखेगा, उस पर क्लिक करें।
Step 2: अपना शहर और सेंटर चुनें अपने नजदीकी शहर (City/Location) को सिलेक्ट करें और ‘Proceed to Book Appointment’ पर क्लिक करें।
Step 3: Mobile Number Verify करें अपना एक्टिव मोबाइल नंबर और कैप्चा (Captcha) डालें। आपके नंबर पर एक OTP आएगा, उसे एंटर करके सबमिट करें।
Step 4: ‘New Aadhaar’ सिलेक्ट करें अब आपके सामने एक फॉर्म खुलेगा। चूँकि आप नया आधार बनवा रहे हैं, इसलिए ‘New Aadhaar’ टैब को चुनें। अपनी पर्सनल डिटेल्स जैसे नाम, जेंडर और जन्मतिथि भरें।
Step 5: Appointment का समय चुनें यह सबसे जरूरी स्टेप है। कैलेंडर में से अपनी पसंद की तारीख और टाइम स्लॉट चुनें। इससे आपको उस समय पर ‘Priority’ मिलेगी।
Step 6: Confirmation और स्लिप डाउनलोड करें फॉर्म सबमिट करने के बाद आपको एक Appointment Slip मिलेगी। इसका प्रिंटआउट ले लें या मोबाइल में सेव कर लें।
4. आधार सेंटर पर क्या होगा?
Apply Aadhar Card Online Step By Step 2026: बुक किए गए समय पर अपने ओरिजिनल डॉक्यूमेंट्स और अपॉइंटमेंट स्लिप के साथ सेंटर पहुंचें:
- वहां का ऑपरेटर आपके डॉक्यूमेंट्स वेरीफाई करेगा।
- आपकी आंखों (Iris) का स्कैन और दसों उंगलियों के निशान लिए जाएंगे।
- आपकी एक लाइव फोटो खींची जाएगी।
- अंत में आपको एक Acknowledgement Slip दी जाएगी, जिस पर ‘Enrolment ID’ (EID) होगी।
5. आधार कार्ड का स्टेटस कैसे चेक करें?
Apply Aadhar Card Online Step By Step 2026: अपना बायोमेट्रिक्स देने के बाद, आप UIDAI की वेबसाइट पर जाकर अपनी EID (Enrolment ID) की मदद से स्टेटस चेक कर सकते हैं। आमतौर पर 15 से 30 दिनों के अंदर आपका आधार जनरेट हो जाता है, जिसे आप ऑनलाइन डाउनलोड भी कर सकते हैं।
6. Top 5 FAQs (Aadhar Card Application)
Q1. क्या नया आधार कार्ड बनवाने की कोई फीस है?
Ans: नहीं, नया आधार कार्ड बनवाना पूरी तरह Free (मुफ्त) है। आपको किसी को भी पैसे देने की जरूरत नहीं है।
Q2. छोटे बच्चों का आधार कैसे बनवाएं?
Ans: 5 साल से छोटे बच्चों के लिए बायोमेट्रिक्स की जरूरत नहीं होती। उनके लिए माता-पिता में से किसी एक का आधार लिंक किया जाता है।
Q3. अगर मेरे पास कोई डॉक्यूमेंट न हो तो क्या करें?
Ans: ऐसी स्थिति में आप ‘Introducer’ या ‘Head of Family’ (HoF) आधारित वेरिफिकेशन का सहारा ले सकते हैं।
Q4. अपॉइंटमेंट बुक करने के कितने दिन बाद कार्ड आता है?
Ans: सेंटर पर बायोमेट्रिक्स देने के बाद लगभग 2-4 हफ्तों में आधार कार्ड पोस्ट के जरिए आपके घर पहुंच जाता है।
Q5. क्या मैं बिना अपॉइंटमेंट के सेंटर जा सकता हूँ?
Ans: हाँ, लेकिन वहां आपको लंबी लाइन में लगना पड़ सकता है और शायद उस दिन आपका नंबर न आए। ऑनलाइन अपॉइंटमेंट लेना हमेशा बेहतर होता है।
Conclusion: स्मार्ट बनें, ऑनलाइन समय बचाएं!
Apply Aadhar Card Online Step By Step की इस प्रोसेस को फॉलो करके आप बिना किसी एजेंट को पैसे दिए अपना आधार बनवा सकते हैं। यह न सिर्फ सुरक्षित है बल्कि सरकारी नियमों के अनुसार भी सही है।
The Complete Guide to Applying for an Aadhaar Card Online: A 2,000-Word Step-by-Step Handbook
Introduction: The Digital Identity Revolution
Apply Aadhar Card Online Step By Step In the landscape of modern India, the 12-digit Aadhaar number has evolved from a novel initiative into a cornerstone of identity verification. Issued by the Unique Identification Authority of India (UIDAI), it is more than just a card; it is a robust, biometric-backed proof of identity and residence that seamlessly connects citizens to a multitude of services.
While the traditional process involved visiting an Aadhaar Enrollment Centre, the online application system has revolutionized accessibility, bringing the power to initiate the process right to your fingertips. This comprehensive guide will walk you through every step of applying for an Aadhaar card online, demystifying the process and ensuring you are equipped with all the necessary knowledge.
Part 1: Understanding Aadhaar and Pre-Application Essentials
Apply Aadhar Card Online Step By Step 2026: Before diving into the application, it’s crucial to understand what you’re applying for.
What is Aadhaar?
Aadhaar is a random 12-digit number that serves as proof of identity and address. It is unique to each individual and remains valid for a lifetime. Its strength lies in its biometric foundation—it links your identity to your fingerprints, iris scan, and photograph—making it highly secure and verifiable.
Who is Eligible?
- Resident of India: Any individual, irrespective of age or gender, who has resided in India for 182 days or more in the 12 months immediately preceding the date of application.
- Newborns & Minors: Children can be enrolled. For children under 5 years of age, biometric data is not collected; only a photograph is taken. The child’s Aadhaar is linked to the parent/guardian’s Aadhaar. A mandatory biometric update is required when the child turns 5 and again at 15.
Mandatory Documents You Need (The Supporting Cast)
The online process begins with pre-booking an appointment, but the actual enrollment is physical due to biometric capture. You must carry original documents for verification. UIDAI accepts a wide range of documents categorized as:
- Proof of Identity (PoI): Passport, PAN Card, Voter ID, Driving License, Ration Card, etc.
- Proof of Address (PoA): Passport, Bank Statement, Utility Bill (water/electricity/gas), Property Tax Receipt, etc.
- Proof of Relationship (For children): Birth Certificate, School ID card (with parent’s name), or a declaration from a hospital/gram panchayat.
Pro Tip: Always check the UIDAI’s official website for the latest and exhaustive list of acceptable documents. Carry at least one original document from each category you require (PoI and PoA).
Part 2: The Step-by-Step Online Application Process (The Pre-Booking)
Apply Aadhar Card Online Step By Step 2026: Contrary to popular belief, you cannot complete theentireAadhaar application from home. The online portal is used topre-book an appointmentat your nearest Aadhaar Enrollment Centre. Here is the detailed walkthrough:
Step 1: Visit the Official UIDAI Website
Navigate to the UIDAI’s official website: https://uidai.gov.in/ or the direct appointment booking portal: https://appointments.uidai.gov.in/. Beware of unofficial third-party websites that may charge fraudulent fees.
Step 2: Locate the ‘Book an Appointment’ Option
Apply Aadhar Card Online Step By Step 2026: From the dropdown menu, select ‘Book an Appointment’. This will redirect you to the appointment booking system.
Step 3: Select Your Location and Center
- Enter your State, District, and Sub-District (Taluka).
- The system will display a list of Permanent Enrollment Centers (PCs) and Aadhaar Seva Kendras (ASKs) in your area. ASKs are typically larger, more streamlined facilities. Choose one based on convenience and available slots.
- You can also search by PIN code.
Step 4: Choose a Date and Time Slot
Apply Aadhar Card Online Step By Step 2026: A calendar will display available dates. Green dates have open slots. Select a date and choose a convenient time from the listed options (e.g., 10:00 AM – 10:15 AM).
Step 5: Fill in Applicant Details
You will be prompted to enter:
- Full Name (as per your PoI document)
- Mobile Number (CRITICAL – all communication and OTPs will be sent here)
- Email Address (optional but recommended)
- Security Code (Captcha)
Step 6: Confirm and Note Your Appointment ID
Apply Aadhar Card Online Step By Step 2026: Double-check all details. After confirmation, the system will generate a16-digit Appointment ID(e.g., 1234 5678 9012 3456).Save this number.You will receive an SMS with this ID and appointment details on your registered mobile number.
Step 7: Download the Appointment Letter (Optional but Advised)
Apply Aadhar Card Online Step By Step 2026: You can download and print the appointment letter. While not always mandatory, it helps streamline the process at the centre.
Part 3: The Enrollment Centre Visit (The Core Process)
Apply Aadhar Card Online Step By Step 2026: On the day of your appointment, arrive at the centre 10-15 minutes early with all documents.
Step 1: Document Submission and Verification
Apply Aadhar Card Online Step By Step 2026: Present your original documents to the operator. They will verify them and return the originals to you immediately.
Step 2: Biometric Data Capture
- Photograph: A digital photograph will be taken. Ensure your face is clearly visible.
- Fingerprints: The fingerprints of all ten fingers will be scanned.
- Iris Scan: Your iris pattern from both eyes will be captured.
Step 3: Data Entry and Review
Apply Aadhar Card Online Step By Step 2026: The operator will enter the demographic details from your documents into the system. You will be shown a screen with all the entered data (name, address, date of birth, gender)for your final review.Scrutinize this carefully—this is your last chance to correct any spelling mistakes or inaccuracies before submission.
Step 4: Acknowledgment Slip
Once you confirm the details and the operator submits the data, you will receive a printed Aadhaar Enrollment Slip (Acknwoledgment Slip). This slip contains:
- Your 14-digit Enrollment ID (EID)
- Date and time of enrollment
- A QR code
- An enrolment number to track status
Apply Aadhar Card Online Step By Step 2026: Guard this slip as carefully as you would the Aadhaar card itself.It is your only proof of enrollment until you receive your Aadhaar number.
Part 4: Post-Enrollment Steps and Tracking
Step 1: Track Your Aadhaar Status
Apply Aadhar Card Online Step By Step 2026: Visit the ‘Check Aadhaar Status’ page on the UIDAI website (https://uidai.gov.in/). Enter your 14-digitEnrollment ID (EID)from the acknowledgment slip, the date and time of enrollment (printed on the slip), and the security code. The portal will show whether your Aadhaar has beenGenerated, Under Process,or if there is anIssue/Rejection.
Step 2: Download Your Aadhaar (e-Aadhaar)
Apply Aadhar Card Online Step By Step 2026: Once the status shows “Generated,” you can download youre-Aadhaar. This is a password-protected PDF file. The password is yourPIN code(if your address has a PIN code) or the first 4 letters of your name in CAPITAL letters followed by your birth year in YYYY format (e.g., RAMA1990).
- Go to ‘Download Aadhaar’ on the UIDAI website.
- You can use your EID or your Aadhaar number (if received via SMS) to download.
- The e-Aadhaar is equally valid as the physical card under the IT Act.
Step 3: Receive Your Physical Aadhaar Letter
Apply Aadhar Card Online Step By Step 2026: UIDAI dispatches the physical Aadhaar card via India Post to your registered address. This can takeseveral weeks to a couple of months. You can track the postal status on India Post’s website using the UIDAI reference number sent via SMS.
Part 5: Special Considerations and Troubleshooting
- For Newborns/Children: The process is identical, but the biometrics of one parent/guardian are taken for linkage. The child’s photo is taken. Remember to carry the child’s birth certificate and the parent’s Aadhaar.
- Updating Details: If you need to correct your name, address, date of birth, etc., after receiving Aadhaar, you must use the “Update Aadhaar” service online or at an enrollment centre. This is a separate, detailed process with its own fee structure.
- “Aadhaar not generated” / Rejection: If your enrollment is rejected, it is usually due to document mismatch, poor biometric quality, or potential duplicate enrollment. The status portal will generally indicate the reason. You will need to re-enroll with correct/verified documents.
- Lost Enrollment Slip: If you lose your acknowledgment slip, you can retrieve your EID using the ‘Retrieve Lost UID/EID’ service on the UIDAI website using your registered mobile number.
Conclusion: Your Gateway to a Connected India
Apply Aadhar Card Online Step By Step 2026: Applying for an Aadhaar card online is a testament to India’s digital governance—a blend of online convenience and essential in-person security verification. By following this guide, you transform from a passive applicant into an informed citizen, navigating the process with confidence. Your Aadhaar is more than plastic and paper; it is a key that unlocks subsidies, bank accounts, SIM cards, and a host of government and private services. Secure it, safeguard it, and use it wisely to fully participate in the digital ecosystem of the world’s largest democracy.
Frequently Asked Questions (FAQs)
1. Can I complete the entire Aadhaar application from home without visiting a centre?
Apply Aadhar Card Online Step By Step 2026: No, you cannot.The online process is strictly forpre-booking an appointment. The capture of biometric data (photograph, fingerprints, iris scan) is mandatory and can only be done in person at an authorized Aadhaar Enrollment Centre or Aadhaar Seva Kendra (ASK). The visit is an unavoidable and critical part of the process.
2. What is the cost of applying for an Aadhaar card?
Apply Aadhar Card Online Step By Step 2026: Enrollment for a new Aadhaar is absolutely free of cost.You should not pay any money at the enrollment centre for a fresh enrollment. However, if you later wish toupdateyour demographic details (like address) or biometrics, a nominal fee is charged as per UIDAI regulations. Be wary of centres or agents demanding money for a new enrollment.
3. I haven’t received my physical Aadhaar card by post. What should I do?
Apply Aadhar Card Online Step By Step 2026: First, download youre-Aadhaarfrom the UIDAI website—it is legally valid. To track the physical letter, use the “Check Aadhaar Status” service. Once generated, an SMS is sent with aPostal Dispatch ID. If it shows delivered but you haven’t received it, or if it’s been over 90 days, you can order areprintof your Aadhaar letter for a small fee via the UIDAI website or at an enrolment centre.
4. How long does it take to get the Aadhaar number after enrollment?
Apply Aadhar Card Online Step By Step 2026: Typically, if the enrollment is successful and without issues, your Aadhaar number isgenerated within 30 to 90 daysof enrollment. You will receive an SMS on your registered mobile number once it is generated. You can then immediately download the e-Aadhaar. The physical card takes additional time for printing and postal delivery.
5. Is Aadhaar mandatory for all citizens?
While the Supreme Court has ruled thatAadhaar cannot be made mandatory for availing essential services(like admission to school or hospital treatment), it is compulsory for filing Income Tax Returns (ITR), receiving certain government subsidies and welfare benefits, and for obtaining a Permanent Account Number (PAN). For most other private and public services, it is one of the most convenient and widely accepted Know Your Customer (KYC) documents.